Introduction to the MISD Web FTP Client | How to Use the MISD Web FTP Client | Print this Document
Introduction to the MISD Web FTP Client
What is FTP?
FTP stands for File Transfer Protocol. It is an Internet service that allows users to copy files to or from computers which hold collections of files.What does this software do?
This FTP web client software will allow you to establish a connection to the MISD FTP server and to transfer files between your computer and the FTP server.What is the web address to access this FTP web client software?
The FTP web client software can be found at http://www.misd.net/mt/ftp.What is needed to use the web FTP client
- This is a Secure FTP site so you must have a username and password to gain access. If you do not have a username and need to transfer files with the MISD Secure FTP server, contact the MISD Helpdesk (586) 228-3399.
- The second requirement is to have a Windows PC, Apple Mac or Linux PC with the Sun Java Virtual Machine software version 1.42 or greater.
Basic steps in using this FTP web client
- Logon to the FTP server
- Navigate to the folder on your PC that has the files or folder you would like to transfer to the MISD server
- Click the transfer button on the web interface to begin the file transfer
- Once the file transfer has been completed, disconnect from the MISD server to logoff.
Can this be done anywhere?
Yes, unless there is a network firewall that prohibits this procedure at your location. Contact your network administrator for assistance.How to Use the MISD Web FTP Client
Quick Links to Topics
- The Interface Overview
- Security Warning Prompt
- Creating The Connection To The FTP Server
- Transferring Files and Folders
- Zipping Files and Folders
- Deleting Files and Folders
- Disconnect From The Server
- Error Messages and known problems
An overview of the FTP web client interface
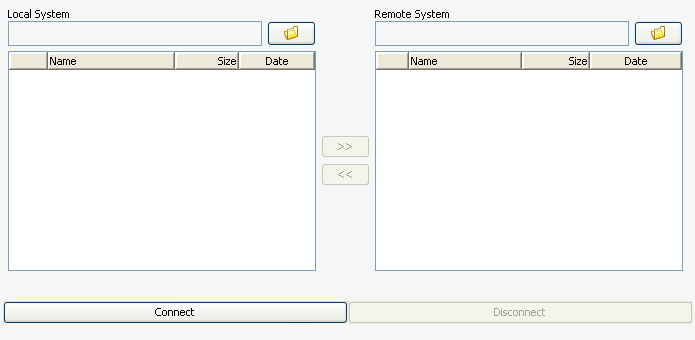
The Web FTP client interface has four sections. At the left are the files and folders on your computer. To the right are the files and folders on the FTP server. In the center are the file transfer buttons used to start the transfer of files between your computer and the server. At the bottom of the screen are the buttons used to connect and disconnect from the MISD server.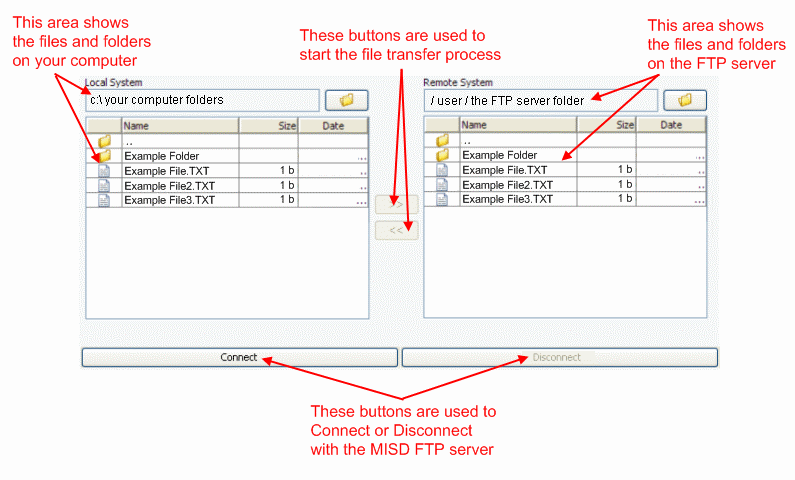
The security warning prompt
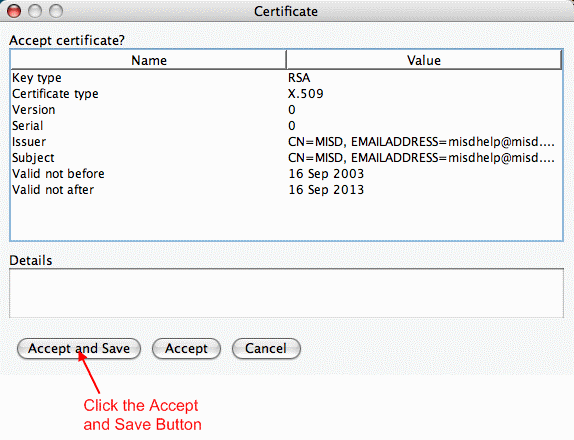
The first time you access the web FTP client the Sun Java Virtual Machine software will begin. You will see a message indicating Warning-Security "The applications digital signature has been verified. Do you want to run this application?". This is normal and acceptance is required to allow the web FTP Java application to transfer the files between your computer and the MISD FTP server. Click RUN to accept the message.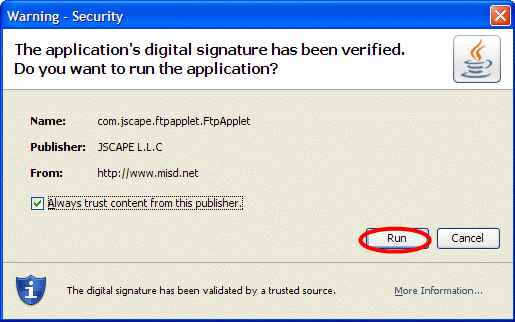
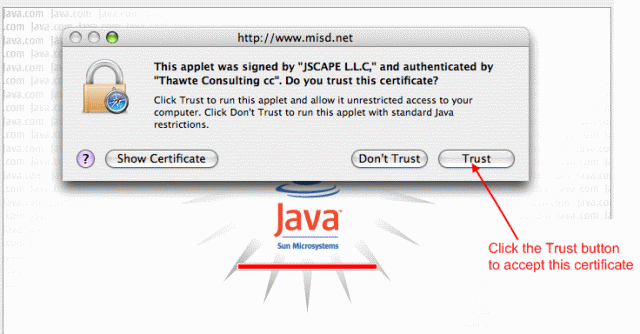
Creating the connection
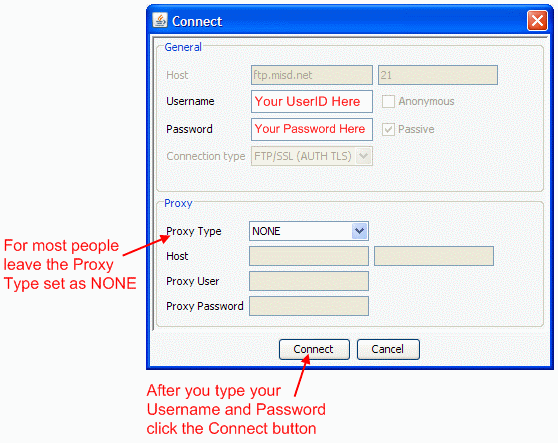
In order to connect to the MISD FTP server you will need to establish a connection to the server. Begin by clicking on the Connect button at the bottom of the main screen.
Transferring Files and Folders
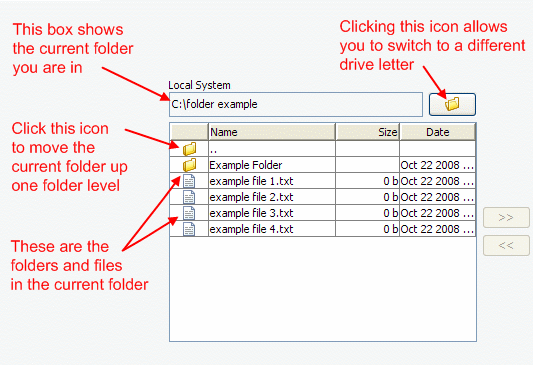
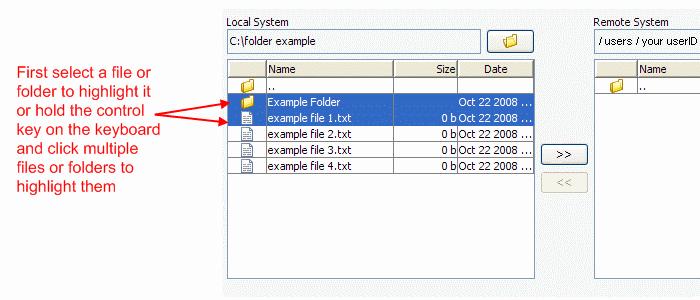
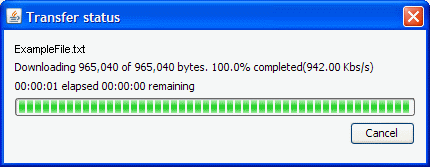
Once the connection has been established you will be taken back to the main menu. On the left side of the screen are the files on your computer. The box under the "Local System" heading will indicate which folder you are currently in. Navigate to the folder that has the files that you would like to transfer to the FTP server. To navigate to a specific folder, one of the following options can be done:- In the box below the words "Local System" that shows the current folder, you can highlight the words in box then press the delete key to empty the box. Now type the path to your folder, as an example c:\example folder , then press the enter key on the keyboard. This will place you into that folder.
- A second option for navigation is to double click the folder with the two dots .. this will move you up one folder level or click on a folder with a name to navigate into that folder.

Zipping files or folders
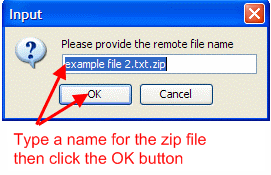
This application supports zipping or compressing the sending files on your computer from within the web page. If you have a large file/folder or have many files to send to the server, you may want to zip the items before sending them to the FTP server. This can be done by left clicking the file or folder to highlight it. Next, right click on the selected file or folder to bring up a menu with additional options. Finally, left click on the Zip Upload option.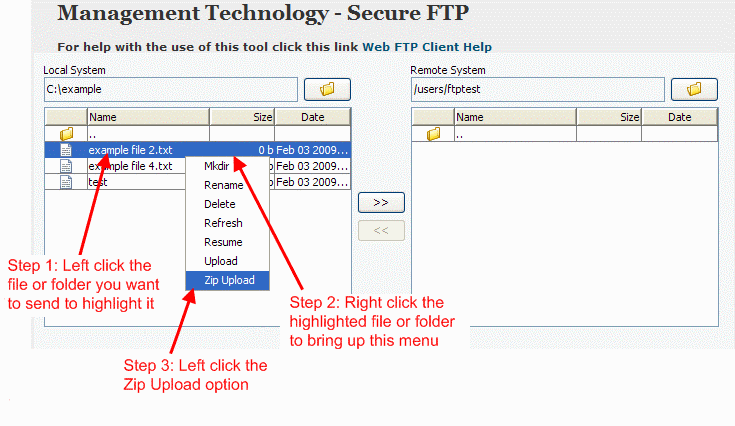
Deleting files or folders
If you would like to delete a file or folder that was copied to the FTP server, this can be done by left clicking on the file or folder to highlight it then right clicking on that item to bring up a menu with the delete option. Click Delete to remove the file.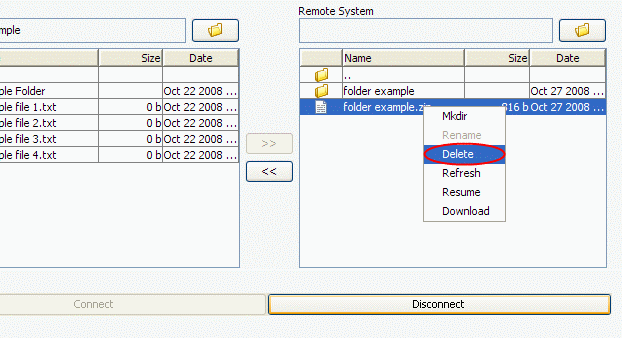
Disconnecting from the server
When you have completed sending files to the server disconnect from the server by clicking on the Disconnect button at the bottom of the screen.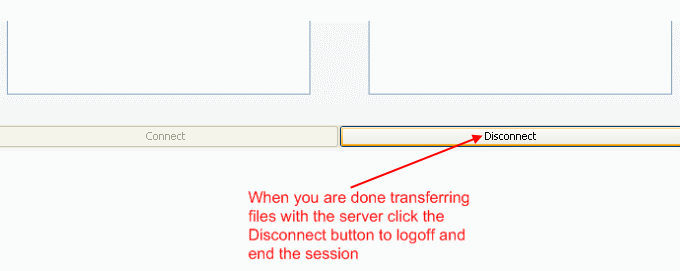
Error Messages and known problems
Issue #1: On occasion you will see a message saying "Error: Connection has been Shutdown: javaax.net.SSLException: Connection reset by peer:" which looks like the message below. This is normal and occurs when your let the connection to the MISD FTP server stay connected for a long time without sending files. If you see this message click the OK button to close the message then click the Disconnect button. Follow the Creating the connection procedures above to reconnect.
